
How to Crochet a Star (4)
Friday, October 17, 2014
Good night!
I can't believe today it's Friday again! I've been really busy this days with the crochet star tutorials and i didn't even notice it ^_^.
Before we start making another type of crochet applique for Christmas, i've for you one more Crochet Star applique =). This one is a little bit more elaborated than the last one, but believe me is still super easy to make!
Remember, the best of this projects is that you can use them all the year and not only in Christmas :)
I hope the tutorial of this crochet star has been very helpful to you, and if you have any doubt please do not hesitate in contact me! =)
Happy crocheting! ^_^
Happy crocheting! ^_^
Thank you so much for everything, do not forget to share this tutorial in your social networks, have a great day! =)
| » MATERIAL |
 | Yellow Yarn or Thread for a 3mm Aluminum Crochet Hook | |
 |
2.5mm Aluminum Crochet Hook | |
 |
Scissors | |
 |
Tapestry needle (pointless) |
 |
| TIP REMEMBER THAT YOU CAN CHANGE THE SIZE OF THE CROCHET HOOK AND YARN ACCORDING TO YOUR PROJECT. |
| » STEP BY STEP |
 |
| STEP 01 / ROW 1 |
Magic ring, *single crochet, single crochet with chain-3 picot*. Repeat from * to * 4 more times. Slip stitch in the first single crochet of the row.
|


|
| TIP TRY TO LEAVE AT LEAST 10CM (ALMOST 4 INCHES) OF YARN WHEN YOU BEGIN THE MAGIC RING, THIS WILL HELP YOU TO FINISH OFF YOUR PROJECT PROPERLY. |
|
| TIP TO SEE THE FULL-SIZE IMAGE YOU HAVE TO CLICK ON THE SMALL PREVIEW. |
|
| TIP
ANOTHER WAY TO BEGIN THE CENTER OF THE STAR, IS MAKING 5 SINGLE CROCHET ON THE MAGIC RING (IN THE FIRST ROW). IN THE SECOND ROW, YOU MAKE *ONE SINGLE CROCHET AND ONE SINGLE CROCHET WITH CHAIN-3 PICOT IN THE SAME STITCH*, REPEAT FROM * TO * 4 MORE TIMES, FINISH WITH A SLIP STITCH AND CONTINUE WITH STEP 02.
|
|
| TIP WE ARE GOING TO FINISH EACH ROW WITH A SLIP STITCH. |
 |
| DID YOU KNOW... THAT THE MAGIC RING IS ALSO KNOWN AS "MAGIC CIRCLE" AND "ADJUSTABLE RING"? |
- - - - - - - - - - - - - - - - - - - - - - - - - - - - - - - - - - - - - - - - - - - - - - - - - - - - - - - - - - - - - - - -
 |
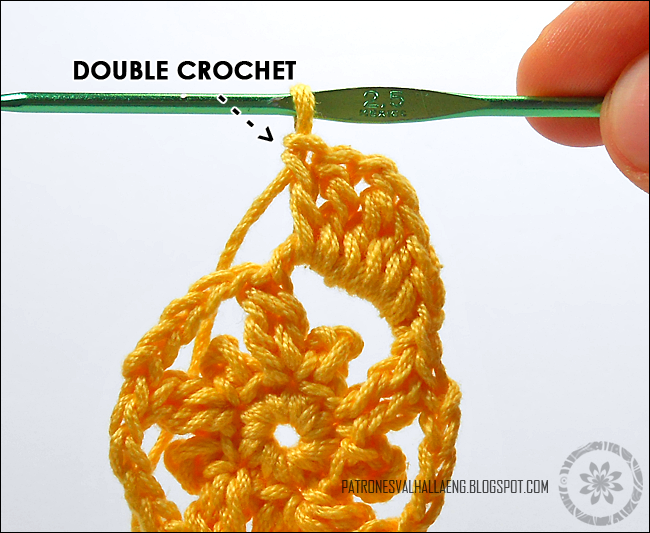
| STEP 02 / ROW 02 |
Chain 3, double crochet in the same stitch, chain 5.
|


 |
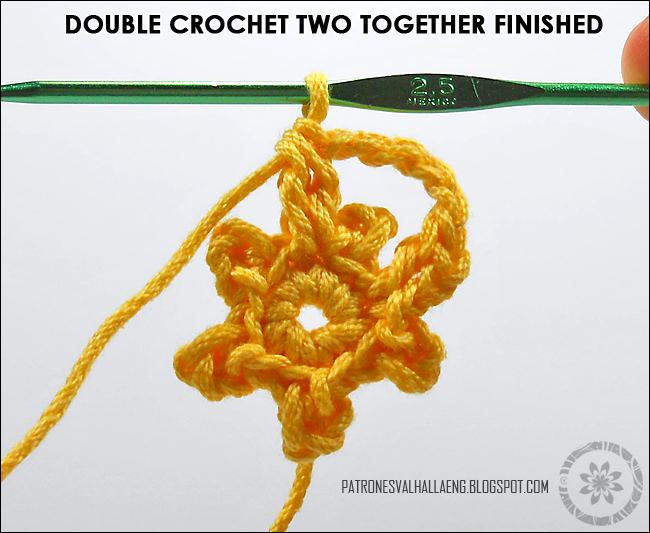
| STEP 03 / ROW 2 |
*Double crochet two together in the nearest single crochet (between two chain-3 picot), chain 5.*. Repeat from * to * 3 more times. Slip stitch in the first double crochet of the row.
|


|
| STEP 04 / ROW 3 |
*Slip stitch in the nearest 5 chain space, chain 1, single crochet, half double crochet, double crochet, double treble crochet, chain 1, double treble crochet, double crochet, half double crochet, single crochet*. Repeat this step 4 more times. Finish off.
|


|
| TIP WE'RE GOING TO WORK ALL THE STITCHES OF THIS STEP IN THE 5 CHAIN SPACES. |
|
| TIP
IN THE LAST PHOTO YOU CAN SEE HOW THE STAR LOOKS WHEN YOU BEGIN THE FIRST ROW WITH 5 SINGLE CROCHET.
|
If you liked the pattern and you know about someone who would love to make it, please don't forget to share the link of this entry, also remember that you can add this project to your PINTEREST board, share it in FACEBOOK, follow this blog with your Gmail account and leave a message in the comments box below! =D


0 comentarios
Thank you very much for your comment!